


I, as many others are infatuated with Jev, which is now a class of models (rather than just the first model release from TypeSafe.)
On that point, after playing with the official Jev API, I wanted to try a Jev class model locally on my Macbook. A bit of googling later and found Open Jev on hugging face and with some help from Codex/Astra had it running locally.
Below is the setup on a MacBook, and then I ran a comparison to an interesting eval, (dungeon crawl text adventure), I had previously built for use with the TypeSafe Jev API.
Running Open Jev, What your MacBook needs
I’m using an M5 Pro with 64 GB of unified memory. For the MLX 4-bit version, here’s the starting configuration I’d suggest:
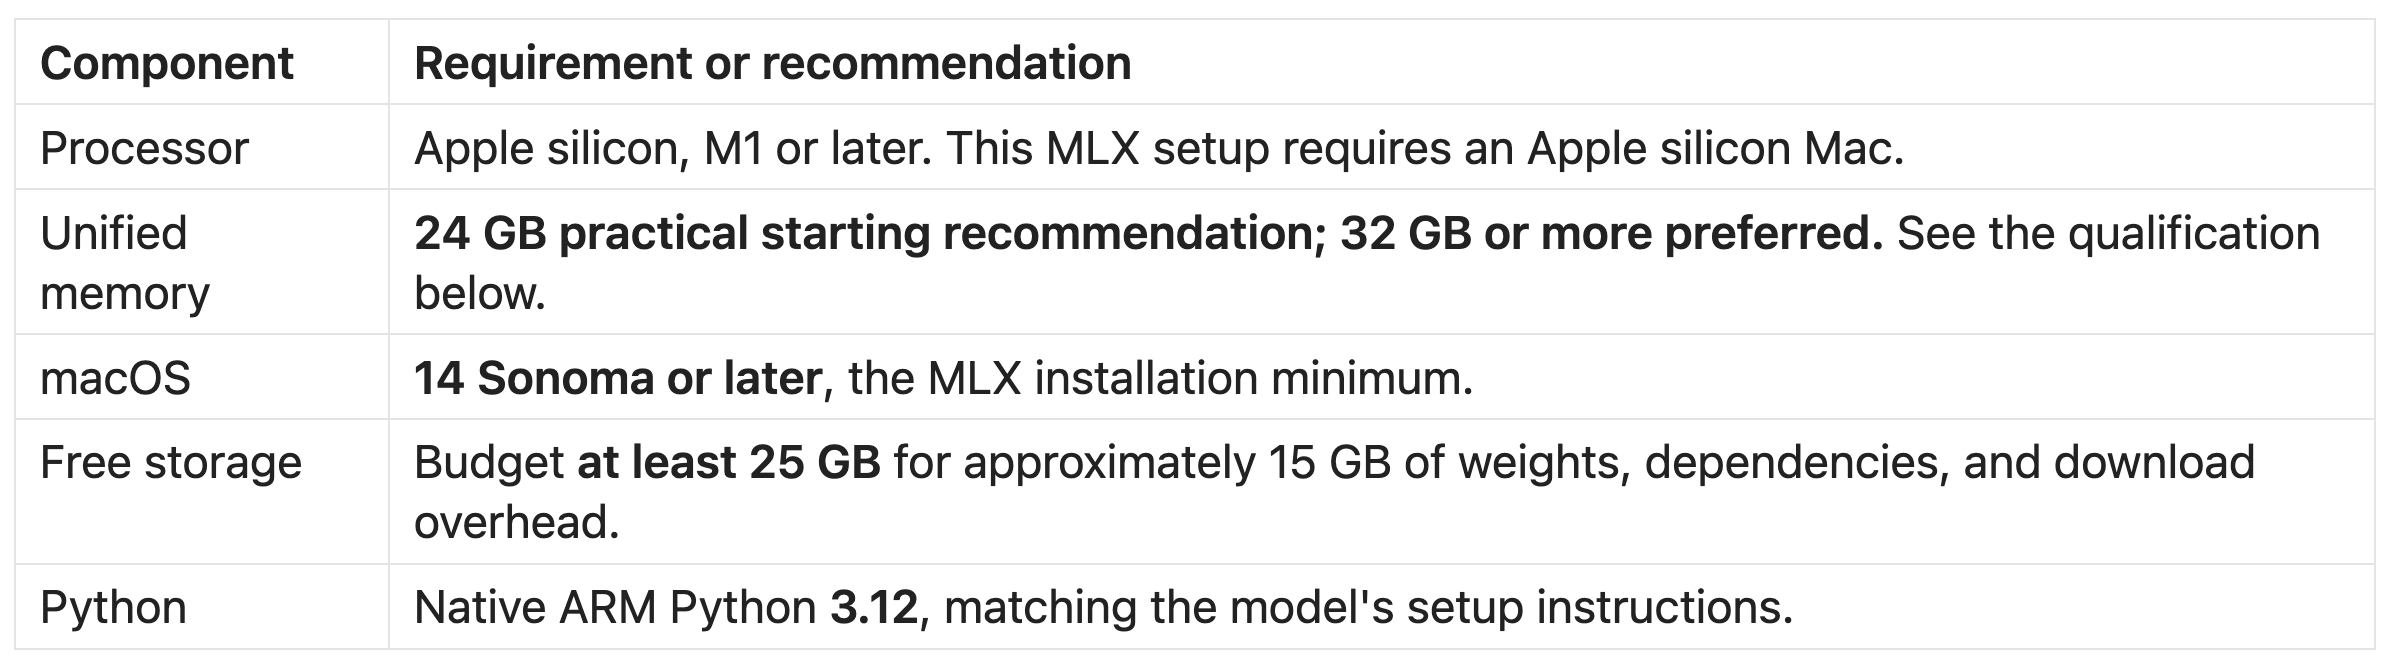
Apple’s MLX installation documentation specifies Apple silicon, native Python, and macOS 14 or later. The pinned MLX 0.32.2 release includes a Python 3.12 package for macOS 14 ARM64. These are dependency requirements, not a claim that I’ve tested OpenJev on every eligible Mac.
Install and download
These commands follow the OpenJev MLX 4-bit setup. In Terminal, install uv if needed. With Homebrew already installed:
brew install uvOther installation options are in the uv documentation.
Create a directory and an isolated Python environment:
mkdir -p ~/Projects/openjev-local
cd ~/Projects/openjev-local

uv venv mlx --python 3.12
uv pip install --python mlx/bin/python \

"mlx==0.32.2" "mlx-lm==0.31.3" \
"transformers==5.17.0" "openai==3.16.2" \
"huggingface-hub==1.32.0"
Download the weights and the two API helper files:
This is a large one-time download
mlx/bin/hf download openjev/openjev-MLX-4bit \
--local-dir openjev-MLX-4bit

mlx/bin/hf download openjev/openjev helper/shim.py helper/shim_mlx.py \
--revision 1c341f65bfe5d50fdb935c71e9739c9e0938d6c4 \
--local-dir openjev-api
Start the API locally
Run this from the same directory:
TOKENIZER=openjev-MLX-4bit SHIM_MODEL=openjev-MLX-4bit \
READOUT_T=0.85 READOUT_NOUL_T=1.829074 READOUT_NOUL_BIAS=0 \
READOUT_TARGETED=1 READOUT_INSTR_STYLE=pyrepr SHIM_STAGGER=1 \
mlx/bin/python openjev-api/helper/shim_mlx.py \

--helper openjev-api/helper/shim.py \
--model openjev-MLX-4bit --port 3000
Keep the terminal (you’ll see the requests come in here). The readout settings control how option scores become probabilities; I’ve simply used the project’s published values.
A quick test, send a decision request
In a second terminal, try this shortened version of the project’s support-routing example:
curl -sS http://localhost:3000/v1/systemone \
-H 'Content-Type: application/json' \
-d '{
  "model": "openjev",
  "state": "Customer message: I was charged twice for my order last week and nobody has replied.",
  "questions": {
    "route": {
      "type": "choice",
      "instructions": "Which team should handle this?",
      "criteria": {
        "billing": null,
        "shipping": null,
        "technical": null
      }
    }
  }
}'
The response includes the chosen label and a probability for each option. Change the state, instructions, and criteria to try your own decision.
Swapping it into a game
Of course the routing one support ticket doesn’t tell you much, thus I pointed Open Jev at something I’d already built against the official TypeSafe Jev API: The Sunken Crypt, a small dungeon crawl POC written in Godot. This is an old school text adventure where your interface to the game is simply a text box. Traditionally classic NLP code in the game is responsible for mapping the user’s input to allowed actions in a given scene.
With the use of a decision model, each turn, the possible moves (take the torch, go north, attack the skeleton) become the options of one Jev Choice, (plus “none of these”.) We use a confidence score to decides what happens:
0.75 or more and the move happens
0.40 or more and the game asks which of two moves you meant, anything lower gets “that doesn’t seem possible”.
Here’s a scripted player successfully (mostly) navigating the dungeon using Snoop Dogg slang, recorded against the TypeSafe API:
Open Jev serves the same API format as TypeSafe, so switching the game over can be done with an environment variable:
JEV_BACKEND=openjev OPENJEV_URL=http://127.0.0.1:3000 godot --path .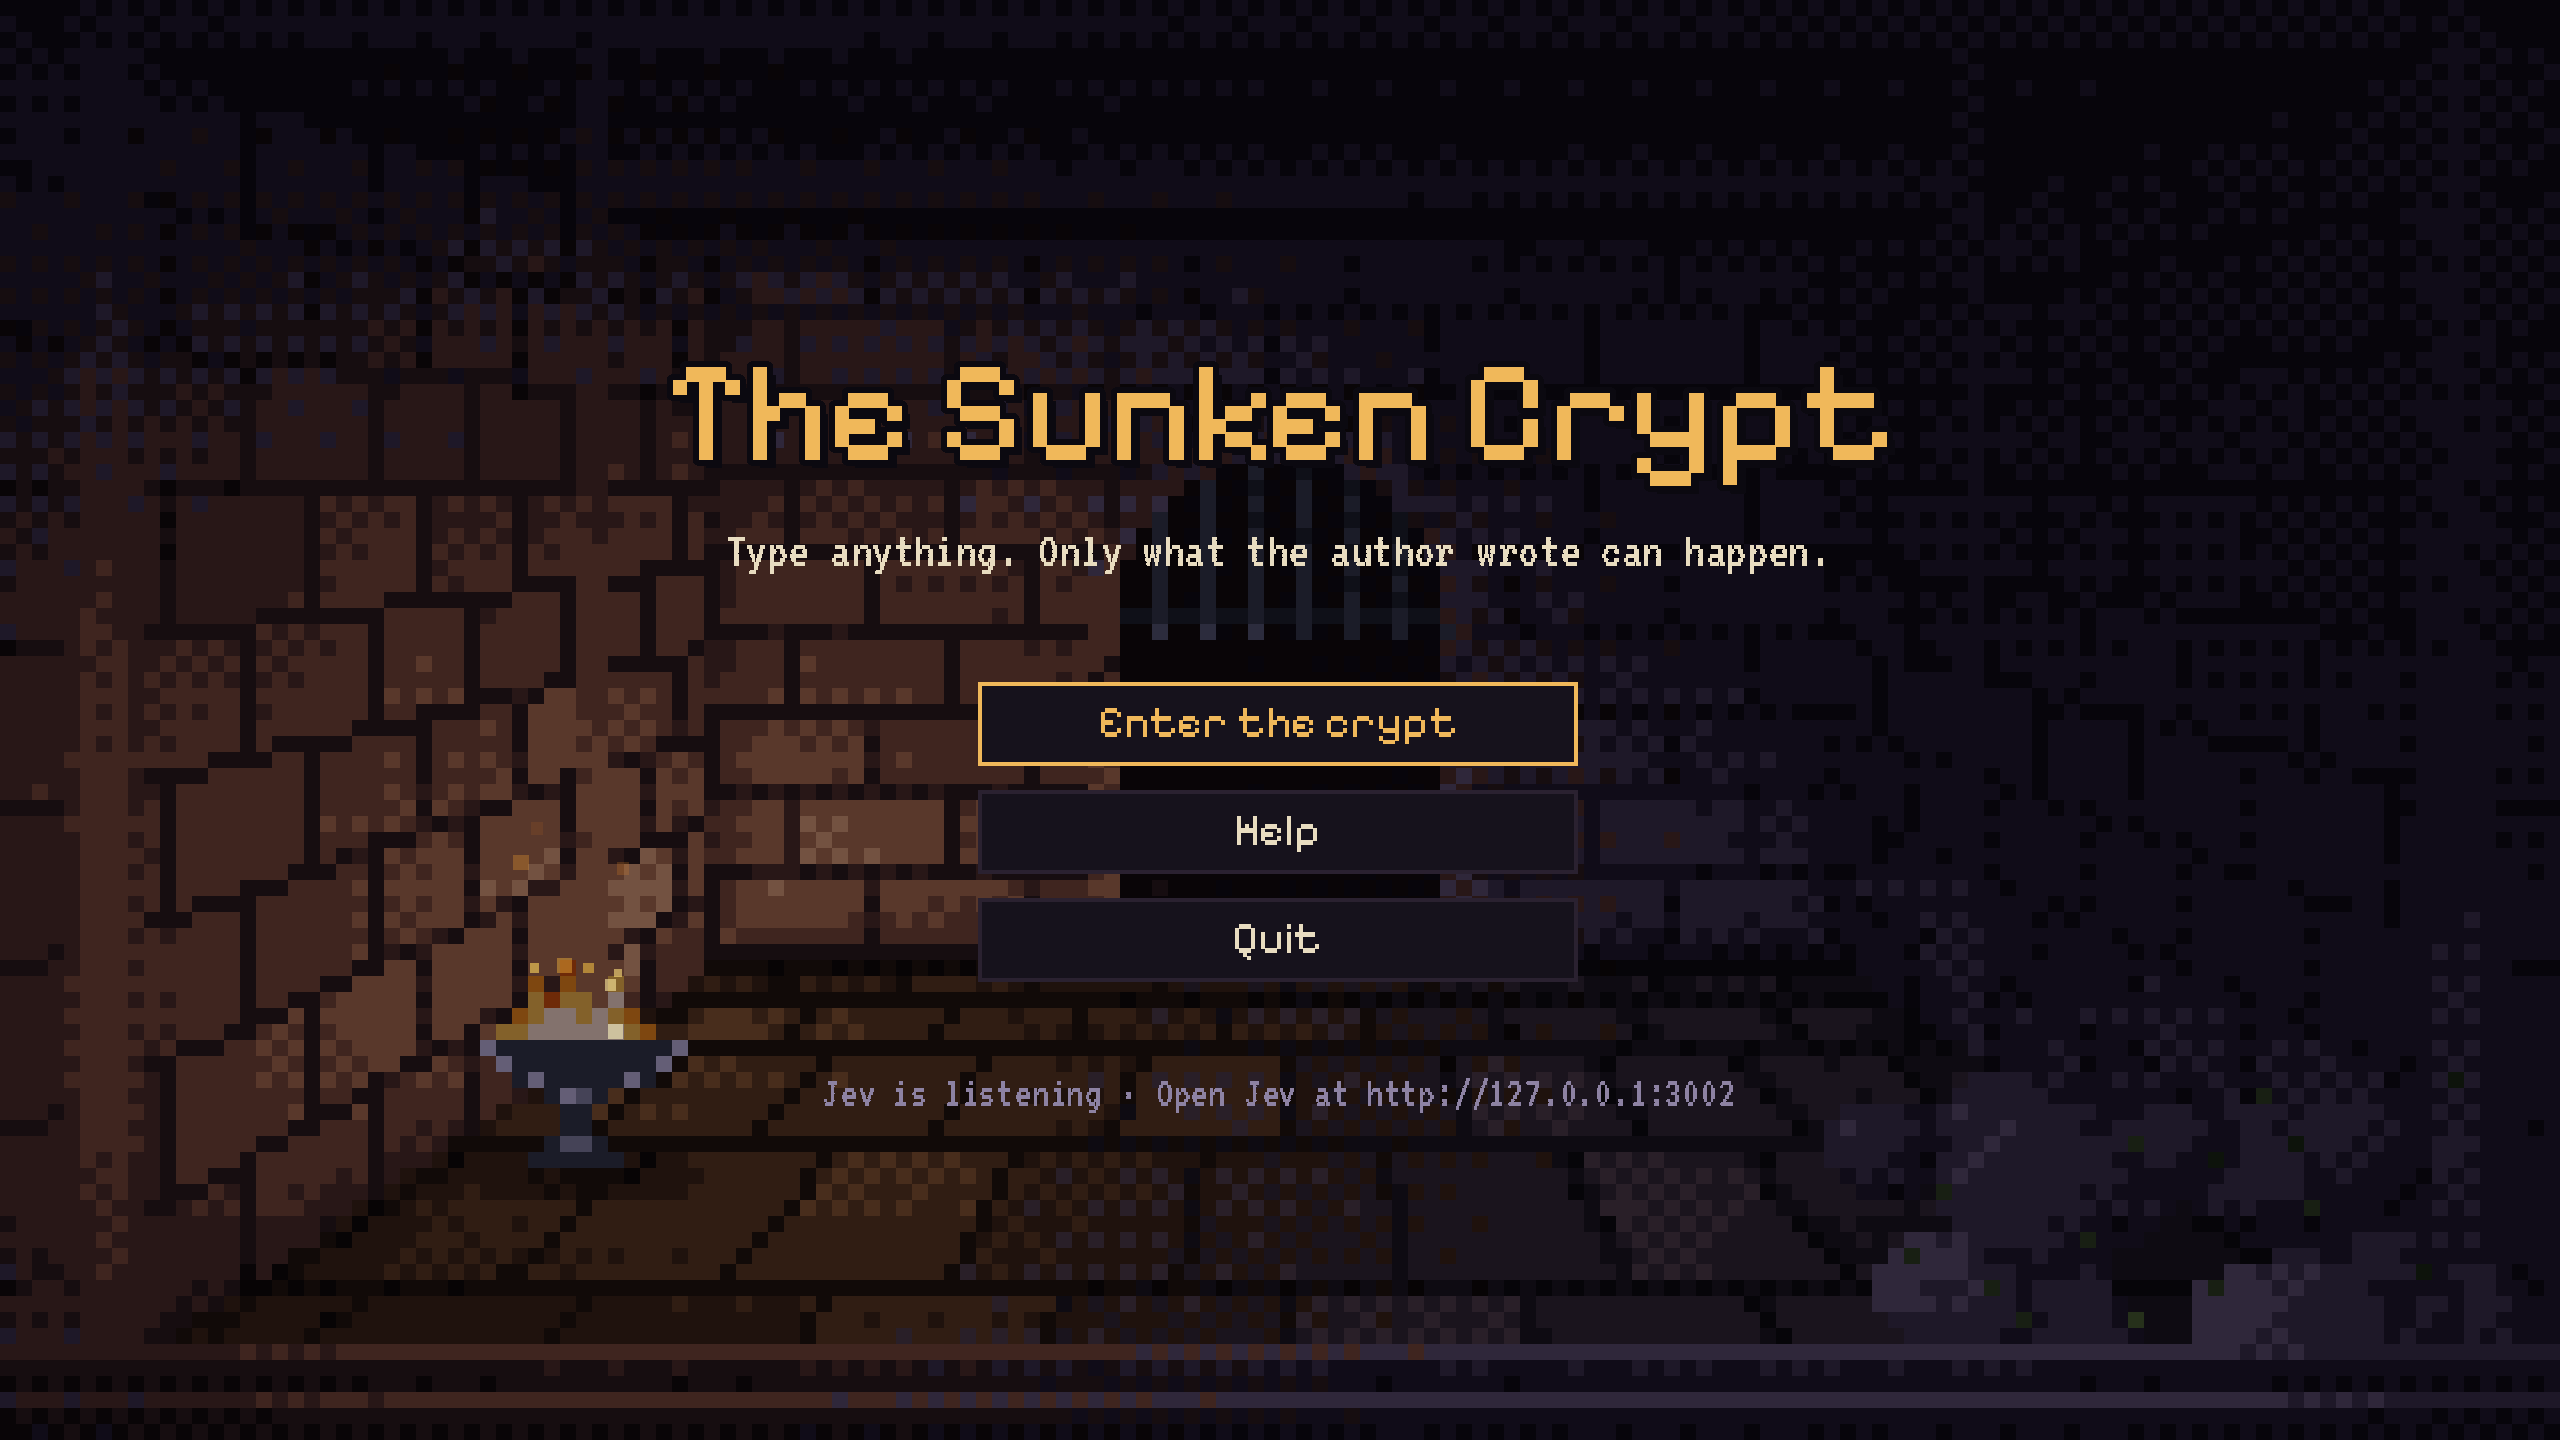
Same user input, both models
The trailer’s 16 lines became my test set. A small script walks the route and, at each step, asks both models the same question in the same game state, through the game’s own parser and thresholds. Both Jev and Open Jev got all 16 lines correct, and gave the same answer on each of 3 repeated runs.
As expected the models did differ on confidence. On the slang movement and pickup lines, TypeSafe’s jev-1.13.0 gave 0.81 to 0.89 and put 8 to 13% on “none of these”. Open Jev gave 0.96 to 0.99 for the same lines:
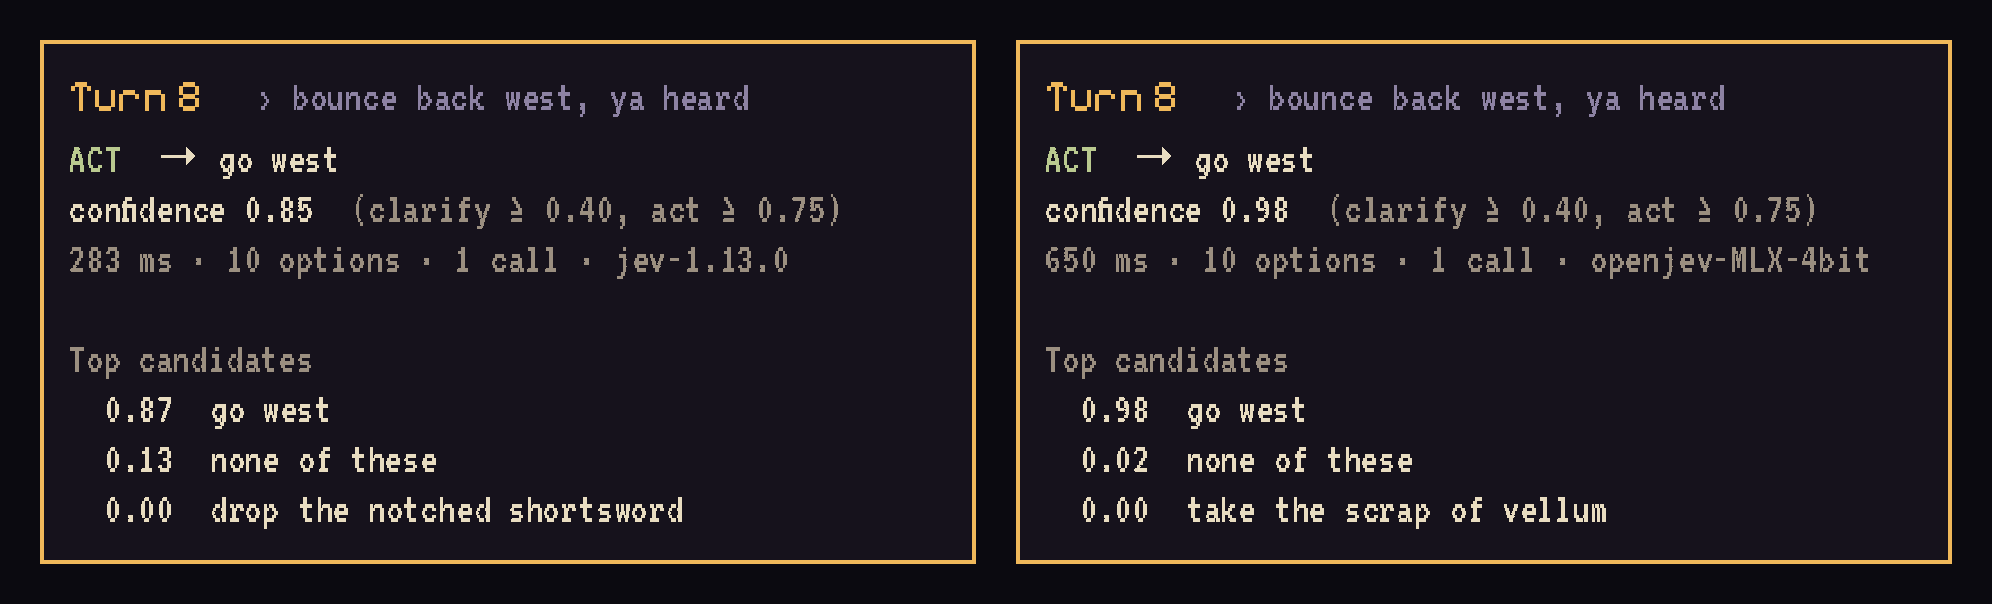
Open Jev also returned exactly the same confidence for a line every round, while TypeSafe’s moved by a few hundredths. That fits how the Open Jev server works: it reads option probabilities from the model’s scores in a single pass, with no sampling.
In the game, both models cleared the 0.75 bar for every line, so play was identical. If the bar were instead at 0.9, TypeSafe’s model would have asked “did you mean...” on four lines where Open Jev would had met the bar and acted.
Since Open Jev was running on my Macbook (which was up to other things at the time), I’m not going to put any credence into a latency comparison, but both were solidly below 1 sec.
This was a fun, small experiment and I plan to do more. All the code is available on Github.
A note about the open Jev Licence
This MLX build accepts text, including JSON and browser DOM. Screenshot input is excluded. The weights use CC BY-NC 4.0; the project asks commercial users to obtain a separate license.